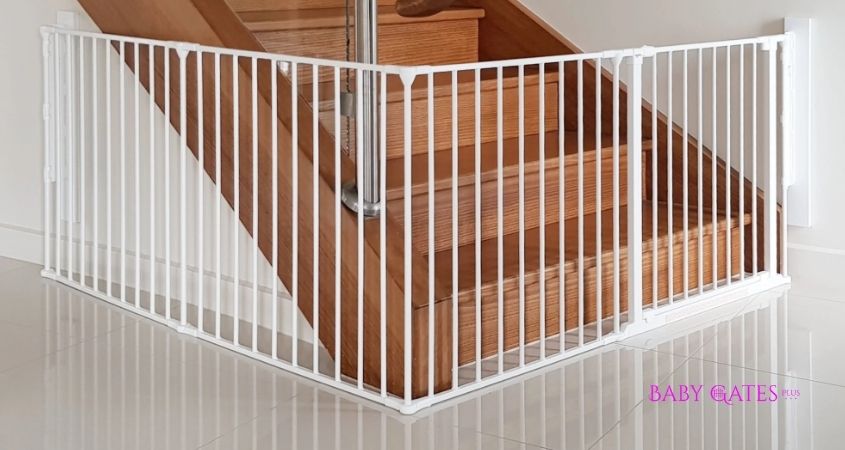
You want to keep your little one safe without ruining your walls. Installing a baby gate sounds simple, but if done wrong, it can leave marks, holes, or even cause the gate to fall.
What if you could put up a sturdy, reliable gate that protects your child and leaves your walls looking perfect? In this guide, you’ll discover easy steps to install a baby gate safely and securely, all while keeping your walls damage-free.
Keep reading to learn how to protect your child and your home at the same time.
Choosing The Right Baby Gate
Choosing the right baby gate is important for safety and wall protection. It helps keep your child safe without causing damage. The right gate fits your space and suits your needs. This section explains how to pick a good baby gate.
Types Of Baby Gates
There are several types of baby gates. Pressure-mounted gates use pressure to stay in place. They do not need screws or holes. Hardware-mounted gates attach to walls with screws. They are more secure but can leave marks. Retractable gates roll up like a blind. They save space and are easy to use. Choose the type that fits your needs and space.
Measuring Your Space
Measure the area where you want to place the gate. Measure the width at the top, middle, and bottom. Use the smallest measurement to ensure a good fit. Check the height to make sure the gate is tall enough. Proper measuring helps avoid gaps and keeps your child safe.
Material And Safety Features
Baby gates come in different materials like wood, metal, and plastic. Metal gates are strong and last long. Wood gates look nice but may need more care. Plastic gates are lightweight and easy to clean. Look for gates with smooth edges and no small parts. Safety locks and easy-open handles help parents and protect children.
Preparing The Installation Area
Preparing the area before installing a baby gate helps protect your walls. It also makes sure the gate fits well and works safely. Taking time now saves you from damage and extra repairs later.
Start by clearing the space and checking the wall’s condition. This step helps find the best spot for the gate and avoids problems during installation.
Cleaning The Wall Surface
Wipe the wall where the gate will go. Use a soft cloth and mild cleaner to remove dust and dirt. A clean surface helps the gate stick or mount firmly. It also stops damage from dirt trapped under mounting parts.
Checking Wall Material
Know what your wall is made of before you drill or stick anything. Drywall, plaster, wood, and tile need different tools and mounts. Testing the wall strength can prevent cracks or holes. Use anchors if needed to hold the gate securely.
Avoiding Obstacles And Hazards
Look for light switches, cords, or vents near the gate spot. These can get damaged or cause trouble with the gate. Choose a clear area to keep your baby safe and protect your home. Check the floor for rugs or uneven spots that might affect gate stability.
Tools And Materials Needed
Installing a baby gate safely without damaging walls needs the right tools and materials. Having everything ready makes the job easier and faster. It also helps protect your walls and keeps the gate sturdy.
This section lists the tools and materials you need. Prepare these before starting your installation.
Essential Tools
Drill with screwdriver bits
Measuring tape
Level
Pencil for marking
Stud finder
Adjustable wrench
Protective Gear
Safety goggles to protect your eyes
Work gloves for hand safety
Dust mask if drilling into drywall
Mounting Accessories
Wall anchors suitable for your wall type
Screws that fit the gate hardware
Rubber pads or bumpers to protect wall paint
Optional: adhesive strips for extra grip
Installing Pressure-mounted Gates
Pressure-mounted baby gates offer a simple way to keep your child safe without causing damage to walls. These gates use tension to stay in place, avoiding screws or drills. They work best in doorways or at the top of stairs where there is a flat surface to press against.
Installing a pressure-mounted gate involves careful positioning and adjustment. This ensures the gate stays secure and does not slip. Proper installation keeps your baby safe while protecting your walls from marks or holes.
Positioning The Gate
Place the gate in the desired doorway or opening. Make sure both sides touch the wall or doorframe firmly. Check that the gate is level and straight. Avoid installing on uneven surfaces or near corners. The gate should cover the entire width of the opening to prevent gaps.
Adjusting Tension
Most pressure-mounted gates have adjustable screws or knobs. Turn these to increase the tension between the gate and walls. Tighten slowly to avoid over-compressing or damaging surfaces. The gate should feel snug but not forceful. Proper tension keeps the gate from moving or falling.
Testing Stability
Push the gate gently from different angles. It should not wobble or shift. Try opening and closing it several times. Check if the gate locks securely in place. If it moves, increase the tension slightly. A stable gate ensures your child stays safe and your walls remain unharmed.
Installing Hardware-mounted Gates Without Wall Damage
Installing a hardware-mounted baby gate can protect your child while keeping your walls safe. Many parents worry about holes and marks from screws. This section explains ways to install gates without wall damage. It focuses on safe, simple methods that keep your home intact.
These techniques work well on drywall, wood, and other surfaces. They help keep your walls clean and your gate secure. You can choose from several options depending on your gate type and wall material.
Using Adhesive Mounts
Adhesive mounts stick to the wall without drilling. They use strong glue pads that hold well under pressure. These mounts suit light to medium-weight gates. Make sure the surface is clean and dry before applying.
Press the adhesive firmly for a few seconds. Wait for the recommended time before attaching the gate. This method leaves no holes or marks on your walls. Some adhesives are removable and do not damage paint.
Employing Wall-friendly Anchors
Wall-friendly anchors reduce damage when screws are necessary. These anchors spread the load and create smaller holes. They work well with drywall and plaster walls. Choose anchors made for easy removal and minimal wall impact.
Drill small pilot holes to avoid large cracks. Insert the anchors gently without forcing them in. Use screws that fit the anchors properly. When you remove the gate, patch the holes quickly with spackle.
Alternative Mounting Techniques
Consider other mounting ideas to protect your walls. Tension-mounted gates use pressure to stay in place. They fit doorways or openings without hardware. These gates avoid all wall damage and are easy to install.
Freestanding gates offer flexibility and no wall contact. You can move them as needed. Some use weighted bases for stability. Choose the right style based on your space and safety needs.
Protecting Walls During Installation
Protecting walls during baby gate installation is very important. Walls can get scratched or dented from gate pressure. Taking simple steps helps keep your walls safe. You can install your baby gate without leaving marks or damage. This section shows easy ways to protect your walls.
Using Protective Pads
Protective pads create a soft barrier between the gate and the wall. These pads stop hard pressure from scratching paint or drywall. You can find foam or rubber pads in hardware stores. Place them where the gate touches the wall. They absorb force and prevent dents. Pads are inexpensive and easy to install.
Temporary Wall Guards
Temporary wall guards add extra protection during installation. These guards stick to the wall with gentle adhesive. They shield the wall from dents and scratches. You can remove them without peeling paint or leaving residue. Wall guards are ideal for renters or those who want no damage. Use them behind pressure points of the gate.
Preventing Scratches And Dents
Prevent scratches by cleaning the wall before installation. Dust or dirt can cause marks under pressure. Tighten the gate carefully to avoid too much force on walls. Check alignment often to keep the gate stable. Use soft materials on all contact points. These small steps reduce dents and keep your walls looking new.
Maintaining And Adjusting The Baby Gate
Maintaining and adjusting the baby gate is important for safety and durability. A well-kept gate protects your child and lasts longer. Simple checks and small fixes keep the gate strong and secure. Proper care helps avoid damage to walls and keeps the gate working well.
Regular Safety Checks
Check the gate every week for loose screws or parts. Tighten any bolts to keep it steady. Look for cracks or damage in the frame and latch. Make sure the gate closes firmly and locks securely. Replace worn parts right away to prevent accidents.
Adjusting For Wear And Tear
Over time, the gate may shift or become loose. Adjust the tension knobs or screws to fit the opening snugly. If the gate has pressure mounts, retighten them to avoid gaps. Keep the gate aligned to prevent it from leaning or falling. Small adjustments keep the gate safe and strong.
Removing The Gate Without Damage
Remove the gate carefully to protect your walls. Loosen the pressure mounts slowly and evenly on both sides. Avoid forcing the gate, which can leave marks or holes. Use a soft cloth or pads between the gate and wall for extra protection. Store the gate safely for future use.
Frequently Asked Questions
How Can I Install A Baby Gate Without Wall Damage?
Use pressure-mounted gates that rely on tension, not screws. Avoid drilling or adhesive hooks. This protects your walls from holes and marks while keeping the gate secure.
What Tools Are Needed For Safe Baby Gate Installation?
Typically, you need a measuring tape, level, and screwdriver. For pressure-mounted gates, tools may not be necessary. Follow the manufacturer’s instructions for best results.
Can I Install A Baby Gate On Drywall Safely?
Yes, by using pressure-mounted gates or adhesive hooks designed for drywall. Avoid screws or nails that can cause permanent damage. Always check weight limits for safety.
How Do I Ensure The Baby Gate Is Secure But Wall-friendly?
Choose tension-mounted models and tighten them properly. Check stability regularly and avoid over-tightening to prevent wall stress. This balances security and wall protection.
Conclusion
Installing a baby gate without hurting your walls is simple with the right steps. Use the right tools and protect your surfaces well. Check the gate’s fit carefully before tightening anything. Keep your child’s safety as your top priority. A well-installed gate gives peace of mind and keeps your home safe.
Take your time and follow the instructions closely. Small efforts make a big difference in avoiding damage. Your walls stay clean, and your child stays secure. Easy, safe, and damage-free—that’s the goal.